Very proud (again!) to have been selected again to present at Troopers 2024!
Somewhere in the week of June 24th – 28th, I will be challenging the demo gods for a full hour. Let’s just hope everything goes as planned!
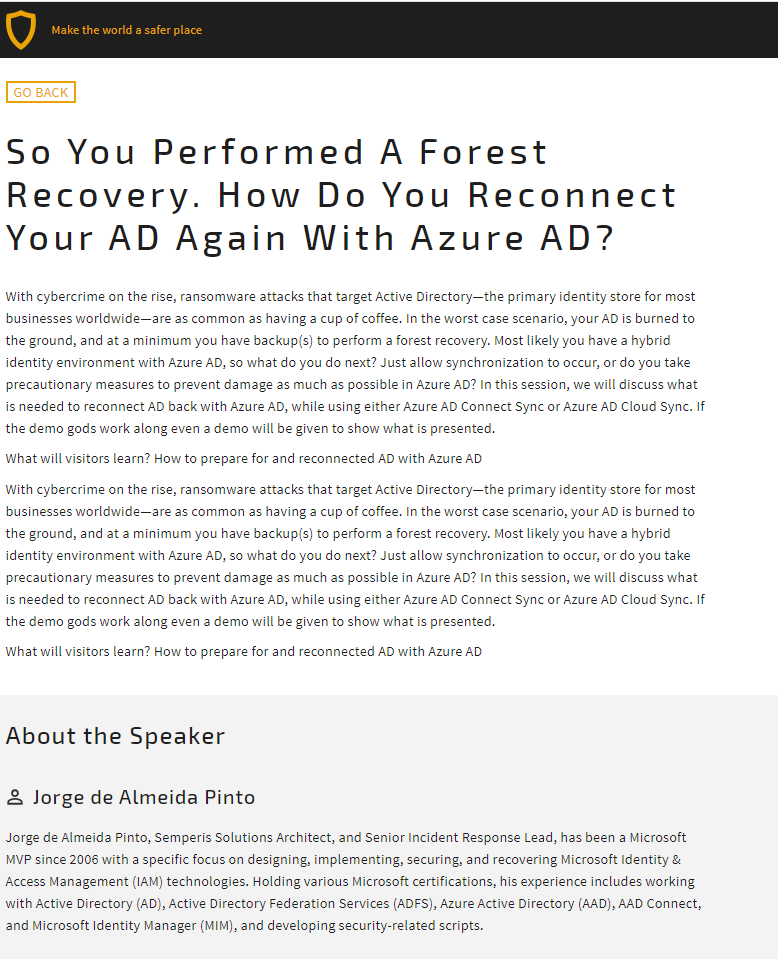
Last year at Troopers I presented about the “Best Practices for Resynchronizing AD and Entra ID After Forest Recovery”. This year, I will actually show you how this can be done for real!
————————————————————————————————————————————————————- This posting is provided “AS IS” with no warranties and confers no rights! Always evaluate/test everything yourself first before using/implementing this in production! This is today’s opinion/technology, it might be different tomorrow and will definitely be different in 10 years! DISCLAIMER: https://jorgequestforknowledge.wordpress.com/disclaimer/ ————————————————————————————————————————————————————- ########################### IAMTEC | Jorge’s Quest For Knowledge ########################## #################### https://jorgequestforknowledge.wordpress.com/ ###################
On Friday, June 7th, I will be presenting a session at “European Identity and Cloud Conference 2024”. Very honored to be selected as a speaker and to contribute to helping others.
————————————————————————————————————————————————————- This posting is provided “AS IS” with no warranties and confers no rights! Always evaluate/test everything yourself first before using/implementing this in production! This is today’s opinion/technology, it might be different tomorrow and will definitely be different in 10 years! DISCLAIMER: https://jorgequestforknowledge.wordpress.com/disclaimer/ ————————————————————————————————————————————————————- ########################### IAMTEC | Jorge’s Quest For Knowledge ########################## #################### https://jorgequestforknowledge.wordpress.com/ ###################
————————————————————————————————————————————————————- This posting is provided “AS IS” with no warranties and confers no rights! Always evaluate/test everything yourself first before using/implementing this in production! This is today’s opinion/technology, it might be different tomorrow and will definitely be different in 10 years! DISCLAIMER: https://jorgequestforknowledge.wordpress.com/disclaimer/ ————————————————————————————————————————————————————- ########################### IAMTEC | Jorge’s Quest For Knowledge ########################## #################### https://jorgequestforknowledge.wordpress.com/ ###################
Tonight I was reading Dirk-Jan’s post on how Cloud Kerberos Trust, in use by Azure AD Passwordless AuthN, could be used to attack the Active Directory. Very interesting read! For all the details, please see: Obtaining Domain Admin from Azure AD by abusing Cloud Kerberos Trust
This is interesting as normally Active Directory is being used to attack Azure AD. Now it is the other way around, using Azure AD to attack Active Directory. Dirk-Jan explains all the details in his blog post, so please make sure to read that too!
So, after configuring Cloud Kerberos Trust in your AD as explained in Cloud Kerberos trust deployment, you will end up with 2 special objects in AD to support that:
The RODC computer account “AzureADKerberos$”, by default in the Domain Controllers OU;
An additional RODC-like KrbTgt account named krbtgt_AzureAD. This account contains the Kerberos keys used for tickets that Azure AD creates.
The RODC computer account has an additional configuration, being the Password Replication Policy (PRP). For a real RODC, the PRP looks like the following. REMARK: The 2 groups starting with “GRP” are custom and were added by me to this PRP.
Analyzing it
1 default ALLOW group that by default is empty
5 default DENY groups with other high-privileged groups or accounts as members
Figure 1: The Password Replication Policy Of A Read-Only Domain Controller
After configuring Cloud Kerberos Trust in the AD, you will see an RODC-like computer account called AzureADKerberos (=CN), and its password replication policy looks like the following.
Analyzing it:
1 default ALLOW group that by default contains ALL users in the AD domain
9 default DENY groups with other high-privileged groups or accounts as members
Figure 2: The Password Replication Policy Of The RODC Like Computer Account For The Cloud Kerberos Trust
So looking at this, the end result will be that all users in the AD domain, except for high-privileged accounts in the specified high-privileged groups, will be able to use Passwordless Authentication. Those same accounts are subject to an attack, but there is no need to worry as it does not contain high-privileged accounts, right? Wrong!
There may be many accounts in AD, that may not be a member in any of the 9 default DENY group, but still have very high privileges for some (valid) reason. A few that come to mind are the accounts in use by Azure AD Connect Sync (MSOL_* or custom) and Azure AD Cloud Sync (pGMSA_*) to connect to AD and retrieve data from or write data to AD. Those accounts most likely have “Replicating Directory Changes” and “Replicating Directory Changes All” control access right (CAR). Any account with those powers is able to perform DC Sync and get the password hashes of other accounts like the default domain administrator, and the KrbTgt account. But is that enough? Heck no! On the domain NC, you may have accounts with all kinds of exotic permissions that after a few steps allow you to still perform DC Sync. Think about accounts, or even groups configured on the domain NC with other permissions like “Full Control” (allows to perform DC Sync), or “Write DACL” (allows to change the permissions and assign “Replicating Directory Changes” and “Replicating Directory Changes All” control access right, and then perform CD sync), or “Write Owner” (allows to change the permissions and assign “Replicating Directory Changes” and “Replicating Directory Changes All” control access right, and then perform CD sync). As you can see lots of ways to get the required permissions for follow-up attacks. So how would you solve this?
There are 2 ways to solve this problem, and it depends on what you prefer to manage.
If you prefer to manage the Password Replication Policy of the AzureADKerberos RODC-like computer account, then:
Configure all accounts and groups, configured on the domain NC, with explicit permissions for “Replicating Directory Changes” and “Replicating Directory Changes All” control access right (CAR), or “Full Control”, or “Write DACL” or “Write Owner”, in the DENY part of the Password Replication Policy
If you prefer to manage group membership, while at the same time also protecting/preventing explicitly accounts/groups from having the password of the accounts being replicated to other RODCs if in place, then:
Configure the default “Denied RODC Password Replication Group” (objectSID = domainSID-572) in the DENY part of the Password Replication Policy
Configure all accounts and groups, configured on the domain NC, with explicit permissions for “Replicating Directory Changes” and “Replicating Directory Changes All” control access right (CAR), or “Full Control”, or “Write DACL” or “Write Owner”, as members of that default “Denied RODC Password Replication Group”
The second and last option would be my personal preferred way of configuring this.
Figure 3: A Note About The Configuration Of The Group “Denied RODC Password Replication Group”
The note is a weird statement, as when you look at Figure 2, it is not even listed by default, while it should be. My guess is that a mistake was made when the default ALLOW group was replaced by the Domain Users group, they also removed the default DENY group, which should not have happened.
Figure 4: A Note About Relaxing The Password Replication Policy Of The AzureADKerberos Computer Account
Looking at what Dirk-Jan has described, I would NOT recommend in relaxing the Password Replication Policy of the AzureADKerberos Computer Account. Better yet, I would harden it as described Dirk-Jan in his post and by me in this post.
For both NOTES I will try to contact Microsoft to have those statements updated if possible.
You may also want to check out the contributions from Elad Shamir:
————————————————————————————————————————————————————- This posting is provided “AS IS” with no warranties and confers no rights! Always evaluate/test everything yourself first before using/implementing this in production! This is today’s opinion/technology, it might be different tomorrow and will definitely be different in 10 years! DISCLAIMER: https://jorgequestforknowledge.wordpress.com/disclaimer/ ————————————————————————————————————————————————————- ########################### IAMTEC | Jorge’s Quest For Knowledge ########################## #################### https://jorgequestforknowledge.wordpress.com/ ###################
For many years, organizations have been using Active Directory (AD) as their central on-premises identity directory service. Throughout those years many system and/or identity related configurations have been made to support different requirements. About just more than a decade ago Azure Active Directory (AAD) was officially released. For those organizations adopting AAD, something was needed to enable the so called hybrid identity environment consisting of AD on-premises and AAD in the cloud, in terms of authentication and identity provisioning and deprovisioning.
To support identity provisioning and deprovisioning in AAD using AD as the authoritative source, Microsoft offered the Windows Azure Active Directory connector for Forefront Identity Manager (FIM) and Microsoft Identity Manager (MIM). In addition DirSync was also offered, which was later replaced by Azure AD Sync, which was also replaced by Azure AD Connect (AADC). Today AADC is the tool to provision, and deprovision, users, groups and computers sourced from AD in AAD.
Not taking into account the order of offering, today to authenticate against AAD when having an hybrid identity environment, the following options exist, and can therefore be used:
Federated SSO
Pass-Through Authentication (PTA), with or without Seamless Sign-On
Password Hash Synchronization (PHS), with or without Seamless Sign-On
Now, the way to configure any of the available authentication mechanism, is through AADC wizard. The first option “Federated SSO” can be configured by yourself if you know what to do (which is not really difficult), or you can use the AADC wizard. For the last 2 options you must use the AADC wizard. The choice of an authentication method is done during the initial installation/configuration of AADC. Afterwards it is also possible to change the authentication method, and that can be done through the AADC wizard and changing the user sign-in.
Figure 1: Configuring The Authentication Mechanism, A.k.a. The User Sign-In, Through The AAD Connect Wizard For Azure AD
[AD.1] Federated SSO
When choosing Federated SSO, currently the AADC Wizard supports the configuration option to federate with either ADFS (Federation with ADFS), or Ping Federate (Federation with PingFederate). In both cases, you can also choose “Do not configure”, but then you have to configure all by yourself in the corresponding federation system. If you know what is needed and what to do, you can do this yourself, as it is really not that difficult. The latter option “Do not configure” is for sure required when you need some serious customization in the configuration of the federation systems and the processing of the rules for the relying party, a.k.a. application.
This option is most of the time chosen when an organization already has a federation system in place. When this option is chosen, the custom domain in Azure AD is configured as a federated domain. This means that when Azure AD wants to authenticate a user, that is part of a certain custom DNS domain, it will determine the domain is federated. Due to that, it will redirect authentication to the corresponding federation system. The federation system in turn authenticates the user against the directory service the user belongs to, and the user is redirected back to Azure AD.
So, in this case, Azure AD depends on the federation system and the federation system (e.g., ADFS) depends on the directory service (e.g., AD). In the case of a ransomware attack against either or both the directory service (e.g., AD) and/or the federation system (e.g., ADFS), authentication against Azure AD for federated domains DOES NOT work anymore.
What can you do about this? Well, the initial thought could be to “fix” the directory service (e.g., AD) and/or the federation system (e.g., ADFS). Unfortunately that can take some serious time, especially if it is too complex or worse if no backups are available. The best way to have a backup authentication, when using federated SSO, is to in addition enable Password Hash Sync (PHS) through AADC. More details about PHS later. As mentioned earlier, when using federated SSO, the custom DNS domain in Azure AD is configured as a federated domain and because of that, Azure AD will always redirect authentication to the federation system. To enable Azure AD to take over authentication, the federated domain needs to be converted to a managed domain. Because Azure AD, through PHS, has the on-premises password hashes, and the domain has been converted, Azure AD will be able to authenticate users, while AD and/or e.g. ADFS are not available yet. Make you test this conversion and determine the impact!!! I have seen it happen where Identity Protection kicks in after converting the domain and the user authenticates natively against Azure AD. When all is good and up and running again, you can convert the custom DNS domain back from managed to a federated domain so that AD/ADFS take over authentication again. Please do take into account the possible impact of people changing their password against Azure AD after converting from federated to a managed domain, and before converting back. When converting back, if a password change occurred, the password known by Azure AD does not match the password known by AD. If you have recovered your AD from a backup, and therefore went back in time, that is also a separate challenge on its own!
MY RECOMMENDATION: do you have and use federated SSO, and you do not have PHS enabled? Enable PHS as soon as possible for ALL synched accounts!!! Also make sure to have a tested and automated plan ready to convert the federated domains in Azure AD to managed domains, so that Azure AD can take over authentication. This will save your and your organizations bacon with regards to the usage of online services (i.e., Azure AD) and anything connected to that if you are ransomwared!
[AD.2] Pass-Through Authentication (PTA), with or without Seamless Single Sign-On
When choosing for Pass-Through Authentication (PTA), with or without Seamless Single Sign-On, organizations most likely have the following situation:
A federated system, like e.g. ADFS, is not in place
On-premises passwords are not allowed to be stored in Azure AD in any form
Passwords policies should also be governed by the on-premises AD and not by Azure AD
If this is the situation or are the requirements, then most likely an organization is using PTA. With PTA, custom DNS domains in Azure AD are configured as managed, but authentication is still not done by Azure AD. PTA is not exactly something like federated SSO, but it does have some similar behavior. When PTA is enabled, Azure AD knows that authentication must be redirected towards the on-premises AD. To make sure “something” on-premises knows how to handle that authentication request, a so called PTA agent is used. After enabling PTA through AADC, the AADC server hosts the first PTA agent. You can install additional PTA agents on additional servers to support the authentication redirection load from Azure AD.
So, in this case, Azure AD depends on the PTA agents and the PTA agents depend on the directory service (e.g., AD). Looks very similar to “Federated SSO” doesn’t it? In the case of a ransomware attack against the directory service (e.g., AD), authentication against Azure AD DOES NOT work anymore.
What can you do about this? Well, the initial thought could be again to “fix” the directory service (e.g., AD). Unfortunately, as before, that can take some serious time, especially if it is too complex or worse if no backups are available. OK, but is there a backup authentication like with “Federated SSO”. Well, the answer is again PHS. But wait!!! You chose PTA because you did not want to have any form of your passwords in Azure AD, and as backup you want to use PHS. First of all, that is not even possible. And if it were possible you would be using an implementation that contradicts itself. Are you also aware that ANY server with a PTA agent, must be considered as a Tier0 server? Trust me, servers with PTA agents belong in Tier0!!!
MY RECOMMENDATION: do you have and use PTA? Then get rid of it and start using PHS AS SOON AS POSSIBLE. You may not want to have your passwords in Azure AD because you think it is a risk, right? Think about the risk and impact on your users when literally not a single user would be able to authenticate, because you chose PTA! The problem with PTA is that many think about the requirements as listed earlier, but not many think about the consequences when a ransomware attack occurs. NOT using PTA, but rather PHS instead, this will save your and your organizations bacon big time with regards to the usage of online services (i.e., Azure AD) and anything connected to that if you are ransomwared!
[AD.3] Password Hash Synchronization (PHS), with or without Seamless Sign-On
So if you are or not using “Federated SSO”, and for sure not PTA, then you must be using PHS actively or have it as a backup authentication mechanism. PHS is the best option when not having a federated system and not caring about any form of passwords being stored in Azure AD. There is even a third reason why you would want to have PHS. If you want to use the leaked credential feature of Azure AD, you MUST have PHS enabled, whether or not it is being used actively.
By default with PHS, all synched (user) accounts are in scope of synching their password hash to Azure AD. Although it is possible to only scope PHS to a specific set of groups (done through scoped sync rules in AADC), I highly DO NOT recommend that when we are talking about regular users using online services in or through Azure AD. The whole idea is about being able to use online services in or through Azure AD, when your on-premises AD has been burned to the ground due to a ransomware attack. If you think it won’t happen to you, think again. Todat, it is more about “when”, then “if”.
MY RECOMMENDATION: if you are already using PHS, that means you have chosen wisely. GOOD FOR YOU! With regards to this, there is not much extra what you can do. Just make sure it scopes your complete user population, and not just a part of it.
The moral of this story therefore is:
DO NOT use Pass-Through Authentication (PTA)
DO NOT use Pass-Through Authentication (PTA)
DO NOT use Pass-Through Authentication (PTA)
DO NOT use Pass-Through Authentication (PTA)
DO NOT use Pass-Through Authentication (PTA)
DO NOT use Pass-Through Authentication (PTA)
At least enable Password Hash Sync (PHS) as a backup authentication if you are actively using a federation system for federated SSO against Azure AD
Migrate to start using Password Hash Sync (PHS) as the primary authentication
PS: make sure you update your stakeholders, management and security officers about this, and take appropriate action as needed!
Cheers,
Jorge
————————————————————————————————————————————————————- This posting is provided “AS IS” with no warranties and confers no rights! Always evaluate/test everything yourself first before using/implementing this in production! This is today’s opinion/technology, it might be different tomorrow and will definitely be different in 10 years! DISCLAIMER: https://jorgequestforknowledge.wordpress.com/disclaimer/ ————————————————————————————————————————————————————- ########################### IAMTEC | Jorge’s Quest For Knowledge ########################## #################### https://jorgequestforknowledge.wordpress.com/ ###################
When using an Enterprise Application in Azure AD with SAML SSO you need to have SAML Signing Certificate. If that certificate is going to expire, Azure AD will notify you about it and guide you on how to update it to prevent SSO outage.
The e-mail you may receive will be similar to the following
Figure 1: E-mail From Azure AD Warning You About An Upcoming SAML Signing Certificate Expiration –
Clicking on the link for the Azure Portal in numbered item 1, will redirect you to the application question. When I did that, I saw the following for the mentioned application
Figure 2: SSO Configuration For The Mentioned Application –
If you look at it, you see the SSO is disabled. So you might ask yourself why in the heck is Azure AD mailing about an upcoming SAML Signing certificate expiration, is SSO is not even configured? This surprised me a bit.
In this case, and I can’t even remember this, in the past I apparently configured SSO, or played with it, then disabled it while not cleaning up the SAML Signing Certificate. While being disabled, click on the SAML option, and then you will see there is indeed a SAML Signing Certificate, although not in use at all.
Figure 3: SAML Signing Certificate Configured While Not Being In Use At All –
Click on EDIT in the “SAML Signing Certificate” Section and you will see something similar as:
Figure 4: SAML Signing Certificates That Are Configured –
In THIS CASE (SAML Signing Certificate configured, but not in use at all), I clicked on the three dots on the right for the inactive SAML Signing certificate and selected “Delete Certificate” and confirmed with “YES”. Now if you try to delete the last active SAML Signing certificate, Azure AD will not let you do it. Because the SSO was not configured and the app was not even in use, the best option is to delete the complete app from Azure AD.
Lessons learned:
Cleanup you stuff! 🙂
If you do use a SAML SSO configured app, make sure to:
have specified one or more e-mail addresses to receive notifications like these
not ignore these e-mails to make sure SSO is not impacted and does not break
renew these SAML Signing certificates in time
when configuring Azure AD with a new SAML Signing certificate, to also update the Azure AD SAML configuration in the application itself
Cheers,
Jorge
————————————————————————————————————————————————————- This posting is provided “AS IS” with no warranties and confers no rights! Always evaluate/test everything yourself first before using/implementing this in production! This is today’s opinion/technology, it might be different tomorrow and will definitely be different in 10 years! DISCLAIMER: https://jorgequestforknowledge.wordpress.com/disclaimer/ ————————————————————————————————————————————————————- ########################### IAMTEC | Jorge’s Quest For Knowledge ########################## #################### http://JorgeQuestForKnowledge.wordpress.com/ ###################
[AD.6 – An Automation Account with a scheduled PowerShell Runbook for subsequent processing assignments]
To automate all this coolness you need an automation account that processes everything on a regular basis!
To create an automation account with all that is required, you can use the code below. Make sure to replace the parts corresponding to your own environment and requirements
Invoke-Command -ScriptBlock {
	Function retrieveTenantIDFromTenantFDQN () {
		Param (
			[string]$tenantFQDN
		)

		# Specify The Tenant Specific Discovery Endpoint URL
		$oidcConfigDiscoveryURL = $null
		$oidcConfigDiscoveryURL = "https://login.microsoftonline.com/$tenantFQDN/v2.0/.well-known/openid-configuration"
		$oidcConfigDiscoveryResult = $null

		# Retrieve The Information From The Discovery Endpoint URL
		$tenantID = $null
		$oidcConfigDiscoveryResult = $null
		Try {
			$oidcConfigDiscoveryResult = Invoke-RestMethod -Uri $oidcConfigDiscoveryURL -ErrorAction Stop
		}
		Catch {
			# Placeholder
		}

		# If There Is A Result Determine The Tenant ID
		If ($null -ne $oidcConfigDiscoveryResult) {
			$tenantID = $oidcConfigDiscoveryResult.authorization_endpoint.Split("/")[3]
		}

		Return $tenantID
	}

	Clear-Host

	# Tenant Details
	$tenantFQDN = "<SPECIFY YOUR TENANT FQDN>" # e.g. "<TENANT NAME>.ONMICROSOFT.COM"
	$tenantID = retrieveTenantIDFromTenantFDQN -tenantFQDN $tenantFQDN

	# Application Details
	$msftGraphMgmtAppApplicationID = "<SPECIFY YOUR APPLICATION ID>" # e.g. "56a7b6fe-06f9-5635-9e93-7e5ccacdc08e"

	# Private Key/Certificate Details
	$subjectName = "<SPECIFY THE SUBJECT NAME OF THE CERTIFICATE TO ACCES THE REGISTERED APPLICATION>" # e.g. "mgmt-Admin-Units-MSFT-Graph"
	$exportFolderPath = "<SPECIFY THE EXPORT FOLDER FOR THE PFX FILE>" # e.g. "C:\TEMP"
	$pfxOutputPath = Join-Path $exportFolderPath "$subjectName.pfx"
	$pfxPassword = '<SPECIFY THE PASSWORD PROTECTING THE PFX FILE>' # e.g. 'gLOPeVPMw93YaarLItOLFMF3Y5b6G90jehC1psMOfuZsyj04nElKc2yXrzf6YvHz'
	$pfxPasswordSecure = $(ConvertTo-SecureString $pfxPassword -AsPlainText -Force)

	# Connect Using Azure Automation
	Connect-AzAccount -TenantId $tenantID
	Get-AzSubscription -TenantId $tenantID
	Set-AzContext -Subscription $(Read-Host "Subscription ID...")

	# Details For The Automation Account And Runbook
	$displayName = "<SPECIFY THE DISPLAY NAME OF THE AUTOMATION ACCOUNT>" # e.g. "Managing-Admin-Unit-Assignments"
	$automationAccountDisplayName = "AutmationAccount-$displayName"
	$automationAccountLocation = "<SPECIFY THE AZURE LOCATION TO HOST THE AUTOMATION ACCOUNT>" # e.g. "West Europe"
	$automationAccountResourceGroup = "<SPECIFY THE RESOURCE GROUP NAME FOR THE AUTOMATION ACCOUNT>" # e.g. "RG-Automation"
	$automationAccountRunbookFilePath = "<SPECIFY THE FULL PATH TO THE POWERSHELL CODE FOR THE RUNBOOK>" # e.g. "<FULL FOLDER PATH>\AAD-Automated-Administrative-Unit-Assignment_Auto-Account-Runbook.ps1"

	# Create The Automation Account
	New-AzAutomationAccount -Name $automationAccountDisplayName -Location $automationAccountLocation -ResourceGroupName $automationAccountResourceGroup

	# Upload The PFX File Into The Automation Account
	New-AzAutomationCertificate -AutomationAccountName $automationAccountDisplayName -Name $subjectName -Path $pfxOutputPath -Password $pfxPasswordSecure -ResourceGroupName $automationAccountResourceGroup

	# Create The Required Variables
	New-AzAutomationVariable -AutomationAccountName $automationAccountDisplayName -Name "tenantFQDN" -Encrypted $False -Value $tenantFQDN -ResourceGroupName $automationAccountResourceGroup
	New-AzAutomationVariable -AutomationAccountName $automationAccountDisplayName -Name "appClientID" -Encrypted $False -Value $msftGraphMgmtAppApplicationID -ResourceGroupName $automationAccountResourceGroup

	# Import The PowerShell Script Into The Runbook Of The Automation Account And Publish It
	$runBookMgmtAUAssignments = Import-AzAutomationRunbook -Name "Runbook-$displayName" -Path $automationAccountRunbookFilePath -ResourceGroup $automationAccountResourceGroup -AutomationAccountName $automationAccountDisplayName -Type PowerShell -Published

	# Define A Schedule In The Automation Account
	$timeOfDayForRunbookToExec = "<SPECIFY THE TIME FOR THE RUNBOOK TO EXECUTE>" # e.g. "21:00:00"
	$startTime = (Get-Date $timeOfDayForRunbookToExec).AddHours(24)
	$autoAccountSchedule = New-AzAutomationSchedule -AutomationAccountName $automationAccountDisplayName -Name "Schedule-$displayName" -StartTime $startTime -DayInterval 1 -ResourceGroupName $automationAccountResourceGroup

	# Register The Previous Schedule For The Runbook To Execute
	Register-AzAutomationScheduledRunbook -RunbookName $($runBookMgmtAUAssignments.Name) -ResourceGroupName $automationAccountResourceGroup -AutomationAccountName $automationAccountDisplayName -ScheduleName $($autoAccountSchedule.Name)
}
Figure 1: Creation Of The Automation Account In Azure –Figure 2a: Configured Properties Of The Automation Account – Runbook –Figure 2b: Configured Properties Of The Automation Account – Schedule –Figure 2c: Configured Properties Of The Automation Account – Private Key And Certificate –Figure 2d: Configured Properties Of The Automation Account – Variables –
You can now wait until the runbook executes manually, or you can start it on-demand if you wish!. Just make sure that when you start the runbook manually it completes, before it starts automatically.
Have fun and enjoy!
Cheers,
Jorge
————————————————————————————————————————————————————- This posting is provided “AS IS” with no warranties and confers no rights! Always evaluate/test everything yourself first before using/implementing this in production! This is today’s opinion/technology, it might be different tomorrow and will definitely be different in 10 years! DISCLAIMER: https://jorgequestforknowledge.wordpress.com/disclaimer/ ————————————————————————————————————————————————————- ########################### IAMTEC | Jorge’s Quest For Knowledge ########################## #################### http://JorgeQuestForKnowledge.wordpress.com/ ###################
[AD.5 – A PowerShell script for the initial processing assignment]
In general you would not need this initial processing script. However, that really depends on the size (i.e. amount of objects that need to be processed and assigned to AUs. In my test environment, I tried what is described in AD.6 initially and that worked. But because I was working with 100000+ objects that needed to be assigned to AUs, after 3 hours Azure AD stopped the script due to fair use policy.
I saw the following error message:
Stopped The job has been stopped because it reached the fair share limit of job execution more than 3 hours. For long-running jobs, it’s recommended to use a Hybrid Runbook Worker. Hybrid Runbook Workers don’t have a limitation on how long a runbook can execute. Refer https://docs.microsoft.com/en-us/azure/automation/automation-runbook-execution#fair-share for more details.
Of course I could restarted the runbook or just wait until the schedule would kick in until it was stopped again. This happened at least 3 times. For long running runbooks, Microsoft suggest to use Hybrid Worker Runbooks. So, that’s why I decided to updated the script to be used from an on-premises computer/laptop/server/workstation after connecting to Azure AD. OK, that still takes quite some hours but, it was able to finish without being stopped after some hours of execution due to some limit. The script can be downloaded from HERE.
$tenantFQDN = "<SPECIFY YOUR TENANT FQDN>" # e.g. "<TENANT NAME>.ONMICROSOFT.COM"
$appClientID = "<SPECIFY THE APPLICATION CLIENT ID OF THE APP PREVIOUSLY CREATED>"
$pfxOutputPath = "<SPECIFY HERE THE FULL PATH TO THE PFX FILE>"
$pfxPassword = '<SPECIFY HERE THE PASSWORD PROTECTING THE PFX FILE>'

.\AAD-Automated-Administrative-Unit-Assignment.ps1 -tenantFQDN $tenantFQDN -appClientID $appClientID -pfxFilePath $pfxOutputPath -pfxPassword $pfxPassword
Figure 1a: The PowerShell Script Performing The Initial Assignment Of User And group Objects –Figure 1b: The PowerShell Script Performing The Initial Assignment Of User And group Objects –Figure 1c: The PowerShell Script Performing The Initial Assignment Of User And group Objects –Figure 1d: The PowerShell Script Performing The Initial Assignment Of User And group Objects –
The whole processing will be visible in the Azure AD Audit Logs
Figure 2: All User And Group Assignments Or Unassignments Visible In The Azure AD Audit Logs –
————————————————————————————————————————————————————- This posting is provided “AS IS” with no warranties and confers no rights! Always evaluate/test everything yourself first before using/implementing this in production! This is today’s opinion/technology, it might be different tomorrow and will definitely be different in 10 years! DISCLAIMER: https://jorgequestforknowledge.wordpress.com/disclaimer/ ————————————————————————————————————————————————————- ########################### IAMTEC | Jorge’s Quest For Knowledge ########################## #################### http://JorgeQuestForKnowledge.wordpress.com/ ###################
[AD.4 – A registered application with the correct permissions to manage the AU assignments]
To be able to assign objects (users and groups) in an automatic manner to Administrative Units, a registered application is needed with the correct application permissions (not delegated permissions) to assign the objects that match the filter to the corresponding Administrative Unit.
The following permissions are required:
Group.Read.All
User.Read.All
AdministrativeUnit.ReadWrite.All
After configuring the permissions, those permissions also need to be consented before you can actually use them.
To control the application in a secure authenticated manner, either a client secret can be used or a certificate. I those to use a certificate as that requires possession (private key) and knowledge (password for private key) instead of just knowledge (secret).
The code below will create a self-signed certificate on your local computer, export that to a CER and PFX (protected with a password) and then delete the certificate and private key from the local computer store. It will also present the password on screen for you to copy it to a secure location! Make sure to store the PFX file and its corresponding password in a secure place.
Invoke-Command -ScriptBlock {
	Clear-Host

	# The Subject Name
	$subjectName = "<SPECFIFY THE SUBJECT NAME FOR THE CERTIFICATE>" # e.g. "mgmt-Admin-Units-MSFT-Graph"

	# Tenant Details
	$tenantFQDN = "<SPECFIFY YOUR TENANT FQDN>" # e.g. "<TENANT NAME>.ONMICROSOFT.COM"

	# Certificate Store Location
	$certStoreLocation = "Cert:\CurrentUser\My"

	# Where To Export The Certificate And The Private Key
	$exportFolderPath = "<Folder Path To Export The Certificate Data To>" # e.g. "C:\TEMP"
	$cerOutputPath = Join-Path $exportFolderPath "$subjectName.cer"
	$pfxOutputPath = Join-Path $exportFolderPath "$subjectName.pfx"

	# Splat For Readability
	$createCertificateSplat = @{
		Type				= "Custom"
		Subject				= $subjectName
		KeyFriendlyName		= $subjectName
		KeyDescription		= $subjectName
		FriendlyName		= $subjectName
		DnsName				= $tenantName
		CertStoreLocation	= $certStoreLocation
		Provider			= "Microsoft Enhanced RSA and AES Cryptographic Provider"
		KeySpec				= "KeyExchange"
		KeyUsage			= @("None")
		HashAlgorithm		= "SHA256"
		KeyAlgorithm		= "RSA"
		KeyLength			= 2048
		NotBefore			= $([datetime]::now.AddHours(-1))
		NotAfter			= $([datetime]::now.AddDays(1185)) # 3 Years and 3 months | This is to make sure the process always start in the same period as it otherwise will crawl back!
		KeyExportPolicy		= "Exportable"
	}

	# Create Certificate
	$certificate = New-SelfSignedCertificate @createCertificateSplat

	# Get Certificate Path
	$certificatePath = Join-Path -Path $certStoreLocation -ChildPath $certificate.Thumbprint

	# Generate A Password
	# This only contains numeric and alphanumeroc characters and not any special characters to prevent issues when uploading the private keys and certs.
	# The max length of the generated password depends on the number of available characters, hence repeating the list of characters to allow very long passwords if needed
	$pfxPassword = $(-join (48..57+65..90+97..122+48..57+65..90+97..122+48..57+65..90+97..122+48..57+65..90+97..122 | ForEach-Object {[char]$_} | Get-Random -Count 64))
	$pfxPasswordSecure = $(ConvertTo-SecureString $pfxPassword -AsPlainText -Force)

	# Export Certificate Without Private Key
	Export-Certificate -Cert $certificatePath -FilePath $cerOutputPath | Out-Null
	Export-PfxCertificate -Cert $certificatePath -FilePath $pfxOutputPath -Password $pfxPasswordSecure | Out-Null

	# Deleting The Private Key And Certificate
	Set-Location $certStoreLocation
	Get-ChildItem $($certificate.Thumbprint) | Remove-Item -DeleteKey -ErrorAction SilentlyContinue | Out-Null

	# Displaying The File Paths Of The Exported CER/PFX File
	Write-Host ""
	Write-Host " > File Path For Exported CER File...: '$cerOutputPath'" -ForegroundColor Yellow
	Write-Host " > File Path For Exported PFX File...: '$pfxOutputPath'" -ForegroundColor Yellow

	# Displaying The Password For 60 Seconds. After That The Screen And The Variables Are Cleared
	Write-Host ""
	Write-Host "! ! ! Store The Password Of The Private Key In A Safe Location ! ! !" -ForegroundColor Red
	Write-Host "WARNING: In 60 Seconds The Screen And Variables Will Be Cleared. Copy The Password Value A.S.A.P.!!!" -ForegroundColor White
	Write-Host " > 'PFX Password'.................: '$pfxPassword'" -ForegroundColor Yellow
	Write-Host "! ! ! Store The Password Of The Private Key In A Safe Location ! ! !" -ForegroundColor Red
	Write-Host ""
	Start-Sleep -s 60
	$certificate = $null
	$pfxPassword = $null
	$pfxPasswordSecure = $null
	Set-Location C:\
	Clear-Host
}
Figure 1: Creating A Self-Signed Certificate And Exporting It –
Now we can create the application, configure the required permissions, consent those and upload the certificate to the registered application. Consenting will be done in a semi-automated manner using the device code flow. Run this code in the previous PowerShell window where you already connected to Azure AD.
Invoke-Command -ScriptBlock {
	Function retrieveTenantIDFromTenantFDQN () {
		Param (
			[string]$tenantFQDN
		)

		# Specify The Tenant Specific Discovery Endpoint URL
		$oidcConfigDiscoveryURL = $null
		$oidcConfigDiscoveryURL = "https://login.microsoftonline.com/$tenantFQDN/v2.0/.well-known/openid-configuration"
		$oidcConfigDiscoveryResult = $null

		# Retrieve The Information From The Discovery Endpoint URL
		$tenantID = $null
		$oidcConfigDiscoveryResult = $null
		Try {
			$oidcConfigDiscoveryResult = Invoke-RestMethod -Uri $oidcConfigDiscoveryURL -ErrorAction Stop
		}
		Catch {
			# Placeholder
		}

		# If There Is A Result Determine The Tenant ID
		If ($null -ne $oidcConfigDiscoveryResult) {
			$tenantID = $oidcConfigDiscoveryResult.authorization_endpoint.Split("/")[3]
		}

		Return $tenantID
	}

	Clear-Host

	# Load Assembly To Use The URLEncode Function
	Add-Type -AssemblyName System.Web

	# Load Assembly To Use MessageBox
	Add-Type -assemblyName PresentationFramework

	# Generic Details
	$msftGraphFQDN = "graph.microsoft.com" # FQDN For Microsoft Graph

	# Tenant Details
	$tenantFQDN = "<SPECFIFY YOUR TENANT FQDN>" # e.g. "<TENANT NAME>.ONMICROSOFT.COM"
	$tenantID = retrieveTenantIDFromTenantFDQN -tenantFQDN $tenantFQDN
	$tenantName = "<SPECFIFY YOUR TENANT NAME>"

	# Where To Import The Certificate From
	$subjectName = "<SPECFIFY THE SUBJECT NAME FOR THE CERTIFICATE>" # e.g. "mgmt-Admin-Units-MSFT-Graph"
	$exportFolderPath = "<Folder Path To Export The Certificate Data To>" # e.g. "C:\TEMP"
	$cerOutputPath = Join-Path $exportFolderPath "$subjectName.cer"
	$pfxOutputPath = Join-Path $exportFolderPath "$subjectName.pfx"

	# Azure AD Device Code Request Endpoint URL
	$aadDeviceCodeRequestEndpointURL = "https://login.microsoftonline.com/$tenantID/oauth2/devicecode"

	# Device Code Approval Endpoint URL
	$deviceCodeApprovalEndpointURL = "https://www.microsoft.com/devicelogin"

	# Application Details
	$msftGraphMgmtAppDisplayName = "<SPECIFY THE APPLICATION DISPLAY NAME OF THE REGISTERED APPLICATION>" # Example: "<TENANT NAME>: Mgmt App - Managing Automatic AU Assignments"
	$msftGraphMgmtAppIdentifierURI = "https://$tenantName.onmicrosoft.com/$($msftGraphMgmtAppDisplayName.Replace(" ","-").Replace("---","-").Replace(":-","-"))"
	$msftGraphMgmtAppReplyURL = "https://$($msftGraphMgmtAppDisplayName.Replace(" ","-").Replace("---","-").Replace(":-","-"))"

	# Required Resource Access, In Other Words The Required Permissions
	$requiredResourceAccessPSObjectListMSFTGraphMgmtApp = @(
		[PSCustomObject]@{
			resourceAppId = "00000003-0000-0000-c000-000000000000"	# MSFT Graph => (Get-AzureADServicePrincipal -filter "DisplayName eq 'Microsoft Graph'")
			resourceAccess = @(
				@{
					id = "5eb59dd3-1da2-4329-8733-9dabdc435916"		# AdministrativeUnit.ReadWrite.All => (Get-AzureADServicePrincipal -filter "DisplayName eq 'Microsoft Graph'").AppRoles | ?{$_.Value -eq "AdministrativeUnit.ReadWrite.All"}
					type = "Role"
				},
				@{
					id = "5b567255-7703-4780-807c-7be8301ae99b"		# Group.Read.All => (Get-AzureADServicePrincipal -filter "DisplayName eq 'Microsoft Graph'").AppRoles | ?{$_.Value -eq "Group.Read.All"}
					type = "Role"
				},
				@{
					id = "df021288-bdef-4463-88db-98f22de89214"		# User.Read.All => (Get-AzureADServicePrincipal -filter "DisplayName eq 'Microsoft Graph'").AppRoles | ?{$_.Value -eq "User.Read.All"}
					type = "Role"
				}
			)
		}
	)
	$requiredResourceAccessListMSFTGraphMgmtApp = @()
	ForEach($resourceApp in $requiredResourceAccessPSObjectListMSFTGraphMgmtApp) {
		$requiredResourceAccess = New-Object -TypeName "Microsoft.Open.AzureAD.Model.RequiredResourceAccess"
		$requiredResourceAccess.ResourceAppId = $resourceApp.resourceAppId
		ForEach($resourceAccess in $resourceApp.resourceAccess) {
			$requiredResourceAccess.resourceAccess += New-Object -TypeName "Microsoft.Open.AzureAD.Model.ResourceAccess" -ArgumentList $resourceAccess.Id,$resourceAccess.type
		}
		$requiredResourceAccessListMSFTGraphMgmtApp += $requiredResourceAccess
	}

	# Creating The App Registration
	$msftGraphMgmtApp = New-AzureADApplication -DisplayName $msftGraphMgmtAppDisplayName -IdentifierUris $msftGraphMgmtAppIdentifierURI -ReplyUrls @($msftGraphMgmtAppReplyURL) -RequiredResourceAccess $requiredResourceAccessListMSFTGraphMgmtApp
	$msftGraphMgmtAppObjectID = $msftGraphMgmtApp.ObjectID
	$msftGraphMgmtAppApplicationID = $msftGraphMgmtApp.AppId
	Start-Sleep -s 10

	# Creating The Service Principal
	$msftGraphMgmtSvcPrinc = New-AzureADServicePrincipal -DisplayName $msftGraphMgmtAppDisplayName -AppId $msftGraphMgmtAppApplicationID -AccountEnabled $true -AppRoleAssignmentRequired $false
	$msftGraphMgmtSvcPrincObjectID = $msftGraphMgmtSvcPrinc.ObjectID
	$msftGraphMgmtSvcPrincApplicationID = $msftGraphMgmtSvcPrinc.AppId
	Start-Sleep -s 10

	# Uploading The Certificate To The Application Registration
	$msftGraphMgmtCert = New-Object System.Security.Cryptography.X509Certificates.X509Certificate2
	$msftGraphMgmtCert.Import($cerOutputPath)
	$msftGraphMgmtCertRawData = $msftGraphMgmtCert.GetRawCertData()
	$msftGraphMgmtCertCERBase64 = [System.Convert]::ToBase64String($msftGraphMgmtCertRawData) # Base64 Encode The Public Key
	$msftGraphMgmtCertHash = $msftGraphMgmtCert.GetCertHash() # Get The Custom Key Identifier
	$msftGraphMgmtCertCustomKeyIdentifier = [System.Convert]::ToBase64String($msftGraphMgmtCertHash)
	$msftGraphMgmtCertNotBeforeISO8601Format = (Get-Date $($msftGraphMgmtCert.NotBefore)).ToUniversalTime().ToString("yyyy-MM-ddTHH:mm:ssZ") # Date In ISO8601Format
	$msftGraphMgmtCertNotAfterISO8601Format = (Get-Date $($msftGraphMgmtCert.NotAfter)).ToUniversalTime().ToString("yyyy-MM-ddTHH:mm:ssZ") # Date In ISO8601Format
	New-AzureADApplicationKeyCredential -ObjectId $msftGraphMgmtAppObjectID -Type AsymmetricX509Cert -Usage Verify -CustomKeyIdentifier $msftGraphMgmtCertCustomKeyIdentifier  -Value $msftGraphMgmtCertCERBase64 -StartDate $msftGraphMgmtCertNotBeforeISO8601Format -EndDate $msftGraphMgmtCertNotAfterISO8601Format | Out-Null

	# Grant Consent To The Required Permissions - Build The Request Body To Request A Device/User Code From MSFT Graph
	$msftGraphDeviceCodeRequestBody = @()
	$msftGraphDeviceCodeRequestBody += "resource=$([System.Web.HttpUtility]::UrlEncode($('https://' + $msftGraphFQDN + '/')))"
	$msftGraphDeviceCodeRequestBody += "&client_id=$msftGraphMgmtAppApplicationID"
	$deviceTokenRequestResponse = Invoke-RestMethod -uri $aadDeviceCodeRequestEndpointURL -ContentType "application/x-www-form-urlencoded" -Method POST -Body $msftGraphDeviceCodeRequestBody -ErrorAction Stop
	$msftGraphDeviceCodeResponseUserCode = $deviceTokenRequestResponse.user_code

	# Grant Consent To The Required Permissions - Put The User Code In The Clipboard To Paste It Later As Needed
	Set-Clipboard -Value $msftGraphDeviceCodeResponseUserCode

	# Grant Consent To The Required Permissions - Present A Notification On What To Do Next
	[System.Windows.MessageBox]::Show("A device code has been requested from Azure AD. For this device code the corresponding user code ($msftGraphDeviceCodeResponseUserCode) has been copied to the clipboard. After clicking [OK] an authentication screen will be opened. On that new screen just paste the user code by pressing [CTRL]+[V] and then click [NEXT] to authenticate with your Global Admin Credentials for the AAD Tenant:`n`nTenant FQDN....: '$tenantFQDN'`nTenant ID..........: '$tenantID'`nUser Code.........: '$msftGraphDeviceCodeResponseUserCode'", "Device Code Authentication - Please Read Carefully", 0, 64) | Out-Null

	# Grant Consent To The Required Permissions - Navigate To The Device Approcal URL For The Actual Consent
	[System.Diagnostics.Process]::Start($deviceCodeApprovalEndpointURL)
}
Figure 2: After Requesting The Device Code And User Code To Consent The Application Permissions – Figure 3: Specifying The User Code To Continue Authentication Followed By Consent Of Application Permissions – Figure 4: Signing-In Before Consenting The Required Permissions For The Registered App – Figure 5: Reviewing The Required Permissions For The Registered App – Figure 6: Reviewing The Required Permissions For The Registered App –Figure 7: The Configured Certificate For The Registered App Managing The Automatic AU Assignments –Figure 8: The Configured And Consented Permissions For The Registered App Managing The Automatic AU Assignments –
————————————————————————————————————————————————————- This posting is provided “AS IS” with no warranties and confers no rights! Always evaluate/test everything yourself first before using/implementing this in production! This is today’s opinion/technology, it might be different tomorrow and will definitely be different in 10 years! DISCLAIMER: https://jorgequestforknowledge.wordpress.com/disclaimer/ ————————————————————————————————————————————————————- ########################### IAMTEC | Jorge’s Quest For Knowledge ########################## #################### http://JorgeQuestForKnowledge.wordpress.com/ ###################
[AD.3 – Administrative Units with logic to support some kind of query rules]
Now the data ended up in Azure AD, it is time to start configuring Azure (AD) to support the dynamic assignment for AUs. But first I needed to create the AUs in Azure AD, and although not needed for this exercise I also configured delegation along the way! For that I first created Azure AD security groups that could be assigned role, and then after creating the AU and the groups I assigned the group for the AU the corresponding role for that AU also.
Dynamic groups in Azure AD contain the property with the filter that looks for user objects matching that filter. In other words, the filter itself is stored on the object that needs and uses that filter. With that thought in mind I had to implement something similar for AUs. Unfortunately it appeared not to be possible to extend the Azure AD schema for “AdministrativeUnit” objects. That would have been the best option for this exercise. Therefore I had to reuse an existing attribute that I have control over. That list of attributes is not that big. I had “DisplayName” and “Description”. In this case I chose to (mis)use the “Description” attribute of the AdministrativeUnit object.
I came up with the following structure for the “Description” attribute:
”<real description|filter:user=<filter targeting user objects>|filter:group=<filter targeting user objects>”
Example: “All Test Accounts For AT – Austria|filter:user=Department eq ‘SampleData’ and Country eq ‘Austria’|filter:group=extension_b3d7ffeca7f24ab6bf35bb6ff4918986_department eq ‘SampleData’ and extension_b3d7ffeca7f24ab6bf35bb6ff4918986_location eq ‘Austria’
If you look at the code you see some sleep timers. I had to implement those to make sure that Azure AD had completely instantiated the group so that it could be used in the role assignment.
Invoke-Command -ScriptBlock {
	Function retrieveTenantIDFromTenantFDQN () {
		Param (
			[string]$tenantFQDN
		)

		# Specify The Tenant Specific Discovery Endpoint URL
		$oidcConfigDiscoveryURL = $null
		$oidcConfigDiscoveryURL = "https://login.microsoftonline.com/$tenantFQDN/v2.0/.well-known/openid-configuration"
		$oidcConfigDiscoveryResult = $null

		# Retrieve The Information From The Discovery Endpoint URL
		$tenantID = $null
		$oidcConfigDiscoveryResult = $null
		Try {
			$oidcConfigDiscoveryResult = Invoke-RestMethod -Uri $oidcConfigDiscoveryURL -ErrorAction Stop
		}
		Catch {
			# Placeholder
		}

		# If There Is A Result Determine The Tenant ID
		If ($null -ne $oidcConfigDiscoveryResult) {
			$tenantID = $oidcConfigDiscoveryResult.authorization_endpoint.Split("/")[3]
		}

		Return $tenantID
	}

	Clear-Host

	# Tenant Details
	$tenantFQDN = "<SPECFIFY YOUR TENANT FQDN>"
	$tenantID = retrieveTenantIDFromTenantFDQN -tenantFQDN $tenantFQDN

	# Connect To Azure AD
	Connect-AzureAD -TenantId $tenantID

	# Get The Required Azure AD Roles For The AU Delegation
	$aadDirectoryRoles = Get-AzureADDirectoryRole
	$adminRoleGroups = $aadDirectoryRoles | Where-Object { $_.DisplayName -eq "Groups Administrator" }
	$adminRoleAuthN = $aadDirectoryRoles | Where-Object { $_.DisplayName -eq "Authentication Administrator" }
	$adminRoleHelpdesk = $aadDirectoryRoles | Where-Object { $_.DisplayName -eq "Helpdesk Administrator" }
	$adminRoleUsers = $aadDirectoryRoles | Where-Object { $_.DisplayName -eq "User Administrator" }

	# Build A List Of Data To Create And Configure AUs
	$auData = @()
	$auData += "AT|Austria"
	$auData += "AU|Australia"
	$auData += "BE|Belgium"
	$auData += "BR|Brazil"
	$auData += "CA|Canada"
	$auData += "CH|Switzerland"
	$auData += "CY|Cyprus (Anglicized)"
	$auData += "CZ|Czech Republic"
	$auData += "DE|Germany"
	$auData += "DK|Denmark"
	$auData += "EE|Estonia"
	$auData += "ES|Spain"
	$auData += "FI|Finland"
	$auData += "FR|France"
	$auData += "GB|United Kingdom"
	$auData += "GL|Greenland"
	$auData += "HU|Hungary"
	$auData += "IS|Iceland"
	$auData += "IT|Italy"
	$auData += "NL|Netherlands"
	$auData += "NO|Norway"
	$auData += "NZ|New Zealand"
	$auData += "PL|Poland"
	$auData += "PT|Portugal"
	$auData += "SE|Sweden"
	$auData += "SI|Slovenia"
	$auData += "TN|Tunisia"
	$auData += "US|United States"
	$auData += "UY|Uruguay"
	$auData += "ZA|South Africa"
	$auData += "HIST1|HISTORY1"
	$auData += "HIST2|HISTORY2"
	$auData += "EDUC|EDUCATIONAL"
	$auData += "EMPL|EMPLOYEES"
	$auData += "CONT|CONTRACTORS"

	Write-Host ""
	Write-Host "Creating Administrative Units In The Azure AD Tenant..." -ForegroundColor Cyan
	$auData | ForEach-Object {
		$au = $_
		$auCountryCode = $au.Split("|")[0]
		$auCountry = $au.Split("|")[1]

		# Creating The AU
		Write-Host " > Creating Administrative Unit 'Accounts - Test - $auCountryCode - $auCountry'..." -ForegroundColor Magenta
		If ($auCountryCode.Length -eq 2) {
			$auObject = New-AzureADMSAdministrativeUnit -DisplayName "Accounts - Test - $auCountryCode - $auCountry" -Description "All Test Accounts For $auCountryCode - $auCountry|filter:user=Department eq 'SampleData' and Country eq '$auCountry'|filter:group=extension_b3d7ffeca7f24ab6bf35bb6ff4918986_department eq 'SampleData' and extension_b3d7ffeca7f24ab6bf35bb6ff4918986_location eq '$auCountry'"
		}
		Else {
			$auObject = New-AzureADMSAdministrativeUnit -DisplayName "Accounts - Test - $auCountryCode - $auCountry" -Description "All Test Accounts For $auCountryCode - $auCountry|filter:user=extension_b3d7ffeca7f24ab6bf35bb6ff4918986_employeeType eq '$auCountry'|filter:group=NA"
		}
		Start-Sleep -s 5

		# Creating Admin Groups For The AU
		Write-Host "   # Creating Admin Group 'cld-AAD-Mgmt-AU-$auCountryCode-$auCountry-Groups-Admin' For The AU..." -ForegroundColor Yellow
		$adminGroups = New-AzureADMSGroup -DisplayName "cld-AAD-Mgmt-AU-$auCountryCode-$auCountry-Groups-Admin" -Description "Groups Admins For AU: Accounts - Test - $auCountryCode - $auCountry" -MailEnabled $false -MailNickName $( -join (48..57 + 65..90 + 97..122 | ForEach-Object { [char]$_ } | Get-Random -Count 10)) -SecurityEnabled $true -IsAssignableToRole $true

		Write-Host "   # Creating Admin Group 'cld-AAD-Mgmt-AU-$auCountryCode-$auCountry-AuthN-Admin' For The AU..." -ForegroundColor Yellow
		$adminAuthN = New-AzureADMSGroup -DisplayName "cld-AAD-Mgmt-AU-$auCountryCode-$auCountry-AuthN-Admin" -Description "AuthN Admins For AU: Accounts - Test - $auCountryCode - $auCountry" -MailEnabled $false -MailNickName $( -join (48..57 + 65..90 + 97..122 | ForEach-Object { [char]$_ } | Get-Random -Count 10)) -SecurityEnabled $true -IsAssignableToRole $true

		Write-Host "   # Creating Admin Group 'cld-AAD-Mgmt-AU-$auCountryCode-$auCountry-Helpdesk-Admin' For The AU..." -ForegroundColor Yellow
		$adminHelpdesk = New-AzureADMSGroup -DisplayName "cld-AAD-Mgmt-AU-$auCountryCode-$auCountry-Helpdesk-Admin" -Description "Helpdesk Admins For AU: Accounts - Test - $auCountryCode - $auCountry" -MailEnabled $false -MailNickName $( -join (48..57 + 65..90 + 97..122 | ForEach-Object { [char]$_ } | Get-Random -Count 10)) -SecurityEnabled $true -IsAssignableToRole $true

		Write-Host "   # Creating Admin Group 'cld-AAD-Mgmt-AU-$auCountryCode-$auCountry-Users-Admin' For The AU..." -ForegroundColor Yellow
		$adminUsers = New-AzureADMSGroup -DisplayName "cld-AAD-Mgmt-AU-$auCountryCode-$auCountry-Users-Admin" -Description "Users Admins For AU: Accounts - Test - $auCountryCode - $auCountry" -MailEnabled $false -MailNickName $( -join (48..57 + 65..90 + 97..122 | ForEach-Object { [char]$_ } | Get-Random -Count 10)) -SecurityEnabled $true -IsAssignableToRole $true
		Start-Sleep -s 20

		# Configure Admin Role Assignment For The AU
		Write-Host "   # Assigning The Role '$($adminRoleGroups.DisplayName)' To The Group '$($adminGroups.DisplayName)'..." -ForegroundColor Yellow
		$adminGroupsRoleInfo = New-Object -TypeName Microsoft.Open.MSGraph.Model.MsRoleMemberInfo -Property @{Id = $adminGroups.Id }
		Add-AzureADMSScopedRoleMembership -RoleId $adminRoleGroups.ObjectId -Id $auObject.Id -RoleMemberInfo $adminGroupsRoleInfo | Out-Null

		Write-Host "   # Assigning The Role '$($adminRoleAuthN.DisplayName)' To The Group '$($adminAuthN.DisplayName)'..." -ForegroundColor Yellow
		$adminAuthNRoleInfo = New-Object -TypeName Microsoft.Open.MSGraph.Model.MsRoleMemberInfo -Property @{Id = $adminAuthN.Id }
		Add-AzureADMSScopedRoleMembership -RoleId $adminRoleAuthN.ObjectId -Id $auObject.Id -RoleMemberInfo $adminAuthNRoleInfo | Out-Null

		Write-Host "   # Assigning The Role '$($adminRoleHelpdesk.DisplayName)' To The Group '$($adminHelpdesk.DisplayName)'..." -ForegroundColor Yellow
		$adminHelpdeskRoleInfo = New-Object -TypeName Microsoft.Open.MSGraph.Model.MsRoleMemberInfo -Property @{Id = $adminHelpdesk.Id }
		Add-AzureADMSScopedRoleMembership -RoleId $adminRoleHelpdesk.ObjectId -Id $auObject.Id -RoleMemberInfo $adminHelpdeskRoleInfo | Out-Null

		Write-Host "   # Assigning The Role '$($adminRoleUsers.DisplayName)' To The Group '$($adminUsers.DisplayName)'..." -ForegroundColor Yellow
		$adminUsersRoleInfo = New-Object -TypeName Microsoft.Open.MSGraph.Model.MsRoleMemberInfo -Property @{Id = $adminUsers.Id }
		Add-AzureADMSScopedRoleMembership -RoleId $adminRoleUsers.ObjectId -Id $auObject.Id -RoleMemberInfo $adminUsersRoleInfo | Out-Null

		Write-Host ""
	}
}
Figure 1: Creating The AUs, The Delegation Groups And Configuring The Delegation Roles In Azure AD –
————————————————————————————————————————————————————- This posting is provided “AS IS” with no warranties and confers no rights! Always evaluate/test everything yourself first before using/implementing this in production! This is today’s opinion/technology, it might be different tomorrow and will definitely be different in 10 years! DISCLAIMER: https://jorgequestforknowledge.wordpress.com/disclaimer/ ————————————————————————————————————————————————————- ########################### IAMTEC | Jorge’s Quest For Knowledge ########################## #################### http://JorgeQuestForKnowledge.wordpress.com/ ###################